Pages

Saturday 24 December 2016

Yoga Poses for Eyes |Yoga Exercises For Eyes | Yoga to Improve Eyesight

Just blink - Yoga Exercises for Your Eyes

Some of the yoga exercises are as simple as blinking, yet it is something so powerful. We forget to blink when browsing long hours on our phone / laptop. Blinking and other simple exercises for the eyes make them healthier and stronger and just take a few minutes.

Power yoga for your eyes

  1. Palming
  2. Blinking
  3. Changing focus of eyes from side to side simultaneously
  4. Changing focus of eyes forward and sideways simultaneously
  5. Rotational viewing
  6. Viewing upwards and down simultaneously
  7. Preliminary nose tip gazing
  8. Near and distant viewing
Regular practice of these yoga eye exercises helps to relax eyesight and facilitate the normal functioning of our eyes.
Note: Before starting these exercises, it is always recommended to splash your eyes with cold water a few times. Remember to keep the head and spine straight throughout the exercises.

Palming

  •  Sit quietly with eyes closed and take some deep breaths to relax yourself completely.
  • Rub the palms of your hands vigorously, until they become warm and place the palms gently over your eye lids.
  • Feel the warmth of the palms being transferred onto the eyes and the eye muscles relaxing. Your eyes are being bathed in soothing darkness.
  • Stay in this position until the heat from the hands has been completely absorbed by the eyes.
  • Keeping the eyes closed, lower the hands
  • Once again rub the palms and repeat the process at least three times

Blinking

  •  Sit comfortably with your eyes open.
  • Blink around 10 times very quickly.
  • Close your eyes and relax for 20 seconds. Slowly take your attention to your breath.
  • Repeat this exercise about 5 times.

Sideways viewing

  •  Sit with legs straight in front of the body.
  • Now lift the arms keeping your fist closed and your thumbs pointing upward.
  • Look at a point straight in front of you in level with your eyes.
  • Keep the head in this fixed position, focus on the following one after the other, by shifting your vision to the
    • Space between the eyebrows
    • Left thumb
    • Space between the eyebrows
    • Right thumb
    • Space between the eyebrows
    • Left thumb


  • Repeat this exercise 10 to 20 times.
  • After completing this exercise close your eyes and rest.

  • Observe the following breathing pattern as you perform the above exercise

    • Inhale in the neutral position
    • Exhale while looking to the side.
    • Inhale and come back to the center.

    4- Front and sideways viewing

    • Sit with legs straight in front of the body
    • Then place the left [closed] fist on the left knee ensuring that the thumb points upwards.
    • Look at a point straight in front and in level with your eyes.
    • Keeping the head in this fixed position.
    • Breathing out, focus your eyes on the left thumb.
    • Breathing in, focus your eyes at a point in front and in level with your eyes.
    • Repeat the same process with the right thumb.
    • Then close your eyes and rest.

    5- Rotational viewing

    • Sit with legs straight in front of your body.
    • Place the left hand on the left knee.
    • Hold the right fist above the right knee, with the thumb pointing upwards. Keep the elbow straight.
    • Now keeping the head still, focus your eyes on the thumb.
    • Make a circle with the thumb, keeping the elbow straight.
    • Repeat this exercise five times each in clockwise and anti-clockwise direction.
    • Repeat the process with the left thumb.
    • Close and rest the eyes and relax completely.

    Observe the following breathing pattern during this exercise

    • Inhale while completing the upper arc of the circle.
    • Exhale while completing the lower arc.

    6 - Up and down viewing

    • Sit with legs straight in front of your body.
    • With both the thumbs pointing upwards, place both the fists on the knees.
    • Slowly raise the right thumb keeping the arms straight. Follow the motion of the thumb upwards with the eyes.
    • When the thumb is raised to the maximum, gradually bring it down to the starting position and continue to keep the eyes focused on the thumb all the while keeping the head still.
    • Repeat the same process with the left thumb.
    • Practice this 5 times with each thumb.
    • The head and the spine should be kept straight throughout.
    • Close the eyes and relax.

    Observe the following breathing pattern as you perform the above exercise

    • Inhale while raising the eyes.
    • Exhale while lowering the eyes.

    7- Preliminary nose tip gazing


    • Sit in a cross-legged pose.
    • Lift the right arm straight directly in front of the nose.
    • Making a fist with the right hand, keep your thumb pointing upward.
    • Focus both eyes on the tip of the thumb.
    • Now bend the arm and gradually bring the thumb to the tip of the nose, all the while having the eyes focused on the tip of the thumb.
    • Remain in this position for a while with the thumb held at the tip of the nose with the eyes focused there.
    • Continuing to gaze at the tip of the thumb, gradually straighten the arm.
    • This constitutes a single round.
    • Perform at least five such rounds.

    Observe the following breathing pattern as you perform the above exercise

    • Breathe in while the thumb is pulled to the tip of the nose.
    • Retain inside while holding the thumb at the tip of the nose.
    • Breathe out as the arm is straightened.

    8- Near and distant viewing

    •  Stand or sit by an open window with a clear view of the horizon. Keep the arms by your side.
    • Focus on the tip of the nose for 5-10 seconds.
    • Repeat this for about 10 to 20 times.
    • Close and relax the eyes.

    Observe the following breathing pattern

    • Inhale during close viewing.
    • Exhale during distant viewing.
     After completing all the above exercises, lie in shavasan (corpse pose) for a few minutes and relax yourself completely. Breathe gently and normally, and do not resist any thoughts or sensations during the exercise.
    In the present day world about 35 % of the population suffers from myopia and hypermetropia in varying degrees. These disorders are usually overcome using powerful glasses and lenses which correct the refractive errors of the eye. However one needs to understand that glasses never cure bad eyesight. In fact, using powerful glasses can worsen eye problems. Therefore, one should use glasses only when absolutely necessary.
    Other than a few diseases such as cataract and glaucoma which occur due to bacterial infections, many eye disorders are related to the malfunctioning of the ocular muscles caused by chronic mental and emotional tensions. Yoga techniques help to alleviate various disorders related to defects in the eye muscles such as myopia and hypermetropia. Practicing these exercises regularly for a few months can go a long way in facilitating the normal functioning of our eyes.

    Monday 18 July 2016

    5 SIMPLE YOGA POSES TO REDUCE STUBBORN BELLY FAT

    Practice these five yoga poses to get the toned belly you’ve been working for!

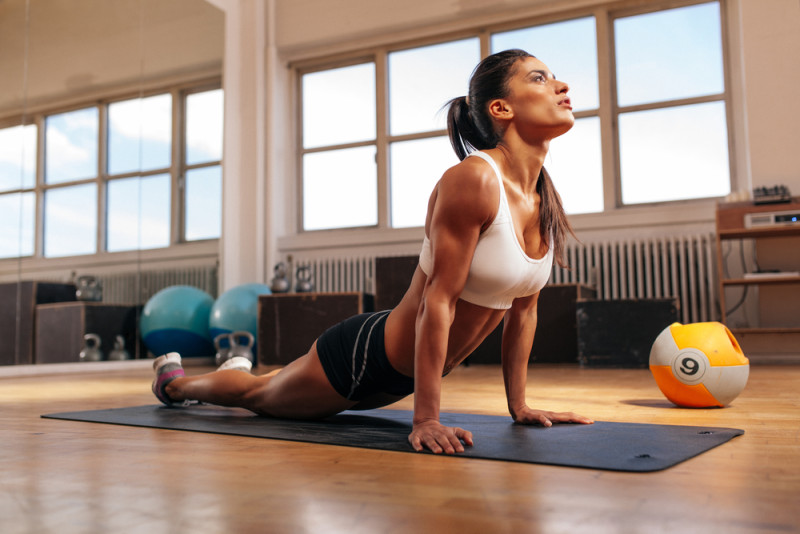
    1. Cobra Posture (Bhujang asana)

    shutterstock_307030703
    This pose can strengthen the ab muscles to reduce belly fat. It will also help to strengthen the upper body by creating a strong and flexible spine. To perform this pose:
    1. Lie on your stomach with your legs stretched out and your palms positioned underneath your shoulders.
    2. Your chin and your toes should be touching the floor.
    3. Inhale slowly and raise your chest upward while bending backward.
    4. Depending on your strength, hold this pose for 15-30 seconds.
    5. Exhale slowly and bring your body back to the original position.
    6. Repeat 5 times with a rest time of 15 seconds in between each pose.
    If you are pregnant, have an ulcer, hernia or back injury, do not attempt this pose.

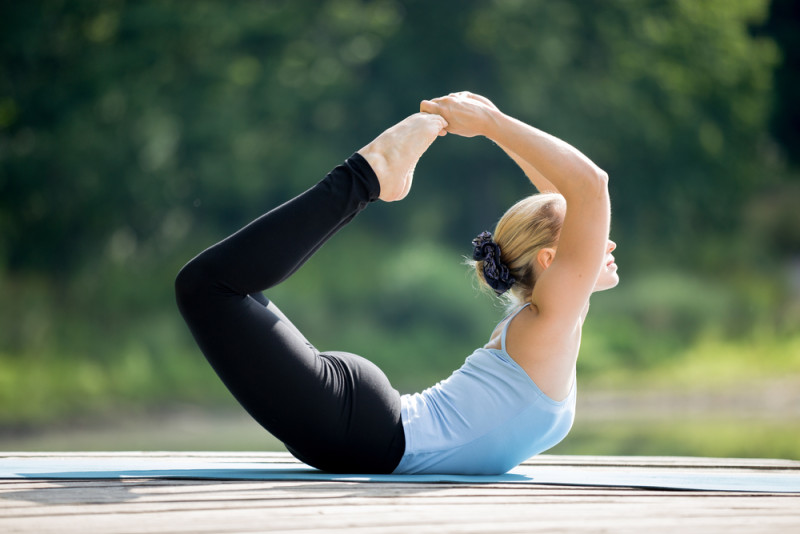
    2. Bow Posture (Dhanurasana)

    shutterstock_310876046
    This pose will strengthen your core and tighten your abs to help reduce belly fat. Rocking back and forth in this pose will stimulate the digestive system and fight constipation, while allowing the body to stretch. To perform this pose:
    1. Lie on your stomach with your legs stretched out and your arms at each side of your body.
    2. Bend at the knees and reach your arms back to your ankles or feet and hold.
    3. Inhale and lift your head, then bend it backward while lifting your legs as high as possible.
    4. Try to hold this pose for 15-30 seconds and keep breathing normally.
    5. Begin to exhale and move back to the original position with your legs stretched out and your arms at your sides.
    6. Repeat at least 5 times with a rest time of 15 seconds in between each pose.

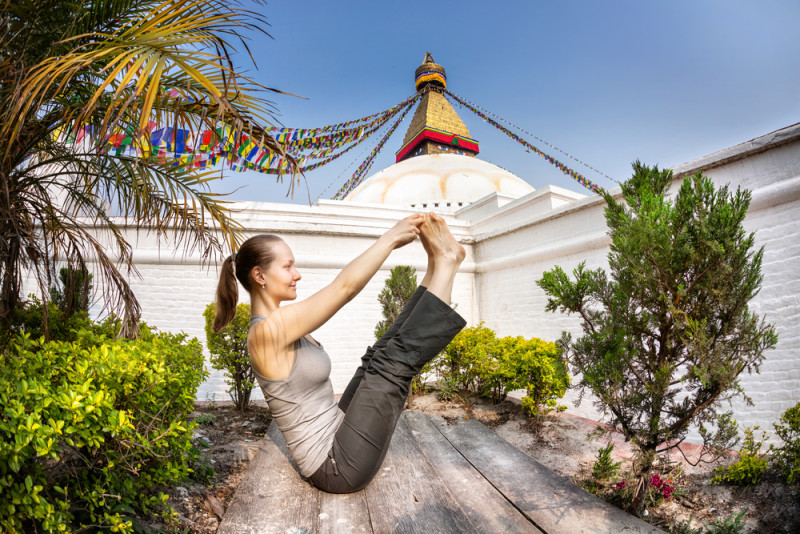
    3. Pontoon Posture (Naukasana)

    shutterstock_250402351
    This pose will help to attack belly fat near the waist, while strengthening the muscles in the legs and back. To perform this pose:
    1. Lie on your back with your legs stretched out but together, and your arms at your sides.
    2. Inhale and begin to raise your legs, keeping them straight.
    3. Stretch your feet and toes and raise your legs as high as you can without bending your knees.
    4. Lift your arms to reach your toes and create a 45-degree angle with your body.
    5. Keep breathing normally and hold this pose for 15 seconds.
    6. Release and exhale.
    7. Repeat this pose 5 times with a rest time of 15 seconds in between each pose.

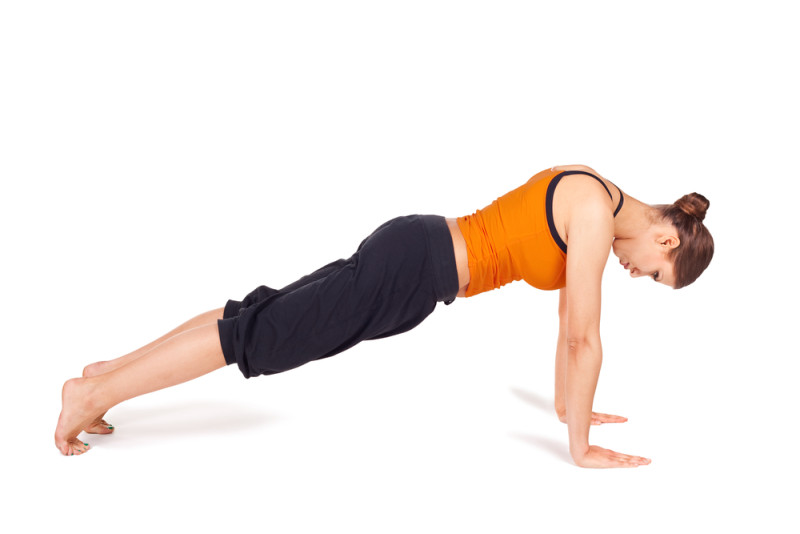
    4. Board (Kumbhakasana)

    shutterstock_55572685
    This is an easy pose to perform. It burns belly fat while toning and strengthening the shoulders, arms, back, thighs and butt. To perform this pose:
    1. Start with your hands and knees underneath your arms and shoulders.
    2. Tuck your toes under and step your feet back to extend your legs behind your body.
    3. Inhale while looking just ahead of your palms, so your neck and spine are aligned.
    4. Tighten your ab muscles and hold.
    5. Your body should form a straight line. Make sure your hands are flat on the ground and your fingers are spread apart.
    6. Hold for 15-30 seconds or as long as possible.
    7. Exhale and drop to your knees.
    8. Repeat this pose five times with a rest time of at leas 15 seconds in between each pose.
    If you have high blood pressure or any type of shoulder or back injury, do not attempt this pose.

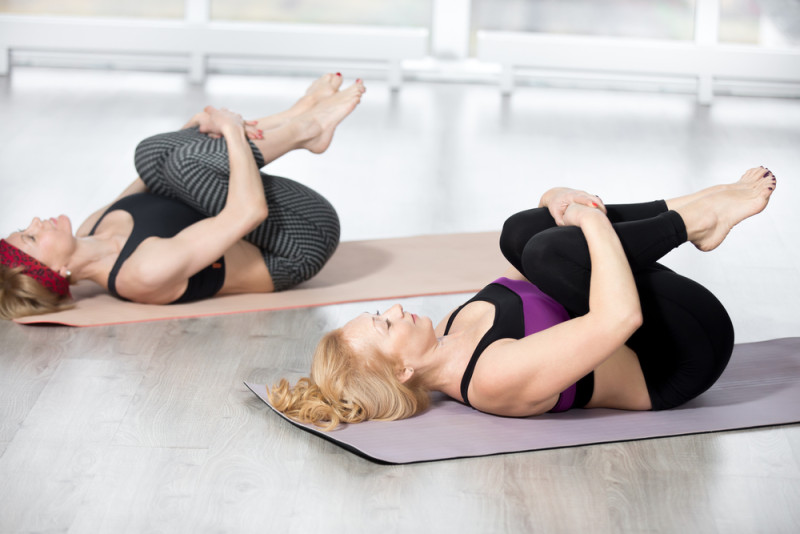
    5. Wind Easing Posture (Pavanamukthasana)

    shutterstock_360224186
    This pose can help to relieve lower back pain while toning the abs, thighs and hips. It is also believed to balance pH levels in the body to enhance the metabolism and promote stomach health. To perform this pose:
    1. Lie flat on your back with your legs stretched out and your arms at your sides.
    2. Your feet should be stretched out with your heels touching each other.
    3. Exhale and bend at the knees while gradually bringing them toward the chest.
    4. Apply pressure to the abdominals using your thighs.
    5. Clasp your hands underneath your thighs to hold your knees in place.
    6. Breathe deeply while holding this pose for 60-90 seconds.
    7. Exhale while releasing your knees and bringing your hands to the sides of your body.
    8. Repeat this pose 5 times with at least 15 seconds of rest time in between each pose.

    Sunday 17 July 2016

    5 Yoga Poses to Reduce Headaches


    5 Yoga Poses to Reduce Headaches


    Have you considered that your posture, and a lack of oxygen could bring on your headaches? Poor posture affects your respiratory system and blood circulation to the brain; which can cause muscle tension - resulting in a headache. Incorporate the following yoga postures on a daily basis to reduce and prevent headaches:

    Simple Seated Twist --
    Sit in a comfortable seated position to start. Turn from the belly to the right, and place your right hand on the floor firmly behind your spine, and twist. Keep your shoulders down and your chest open. Relax your eyes, jaw and tongue. Hold for 10 seconds breathing evenly. Return to center and repeat on the opposite side.

    Grabbing Opposite Elbows --
    Stand with your feet firmly planted on the floor, hip width apart. Clasp your elbows behind your back. Relax your eyes and jaw. Hold for 10 breaths evenly, and release.

    Gomukhasana Arms --
    Stand with feet firmly planted on the floor. Lift your right arm into the air beside your right ear. Bend your right elbow. Reach your right hand behind your back, palm faces your back and place it down between your shoulder blades. Bring your left arm behind your back and climb it up to clasp your hand. Hold for 10 seconds breathing evenly. Release and repeat on the other side.

    Eagle Arms --
    Wrap your arms around your torso, right arm under left, hugging yourself. Bring your hands up; your left elbow rests in your right elbow. Rotate your hands, with your palms facing each other. Relax your eyes, jaw and shoulder blades. Hold for 10 seconds breathing evenly. Release and repeat on the other side.

    Standing Side Stretch --
    Plant your feet firmly on the floor. Lift your arms beside your head. Grab your left wrist with your right hand. On an exhalation, gently stretch to the right, pulling your left arm and wrist with your right hand. Press your weight down to the left buttock. Hold for 10 seconds breathing evenly. Return to center and repeat on the other side.